I like Windows. I have been using it since XP days (let us forget that Vista ever happened). I’m also a software developer, and as much I hate saying this, developing in Windows can suck.
I have recently started getting into ember.js using ember-cli. I loved how easy it is to get started with it and being able to create new parts of your project by simply typing something like ember generate controller foo. But in Windows, the experience is a bit different…
Initial experience
Install ember-cli
npm install -g ember-cli
Create an application
ember new awesomesauce
Add a route
ember generate route gravy
Done, done and done!
Let’s start the server
ember serve
version: 0.1.12
Livereload server on port 35729
Serving on http://0.0.0.0:4200/

Build successful - 1719ms.

Slowest Trees                  | Total
-------------------------------+----------------
TreeMerger (ExternalTree)      | 393ms
TreeMerger (appAndDependencies) | 166ms
TreeMerger (stylesAndVendor)   | 130ms
Concat: Vendor                 | 108ms
CustomStaticCompiler           | 92ms
That was fast!
This sets up a LiveReload server that is listening for our changes to the code, and if there’s a change, the browser automatically refreshes the page. This tightens the development loop.
So if we edit our route template, we should see output on the terminal
file changed templates\gravy.hbs

Build successful - 3273ms.

Slowest Trees                  | Total
-------------------------------+----------------
TreeMerger (stylesAndVendor)   | 585ms
TreeMerger (appAndDependencies) | 437ms
Concat: Vendor                 | 345ms
CustomStaticCompiler           | 339ms
TreeMerger (ExternalTree)      | 254ms
That’s cool right? But as you can see it takes a whole 3 seconds before you actually see the change on your browser. This isn’t a very fast and it gets worse the more changes you make to your project.
More speed, or lack thereof
The ember-cli developers are awesome but the speed problem is an issue with the way symbolic links are handled in Windows, you can read more about it in this GitHub issue.
There are a few solutions recommended on the ember-cli documentation. I tried all them, but I still suffered from slow compile times.
I thought it was over, I didn’t have the patience to wait 3 seconds everytime I made a change. Sure it may not be a long time, but I had a similar setup in a different project using gulp.js and the wait was close to none. I just couldn’t do it.
I didn’t want to use Linux either, not because I’m afraid of it but because WebStorm looks like poop in Linux. Petty reason, but important to me.
Virtual machines
Even though I said I didn’t want to use Linux, I did so anyway. I set up an Ubuntu VM on VirtualBox. Installed all of the stuff necessary to get going and it was way way faster.
But it just looked too ugly.
I was at a bind, ember compiles flawlessly in Linux but the IDE looks horrendous, but it looks just fine in Windows but the compilation process is a pain. I needed a hybrid solution.
Vagrant and Samba
The solution was to use Vagrant to spawn a Linux VM that is running a Samba service that exposes a network folder that both the Windows host and Linux guest can access.
The Vagrant VM will compile the changes that are made to the ember-cli project and I can edit the code on my favourite IDE!
Brilliant!
Vagrantfile
To get this setup working, you’ll need to have Vagrant and VirtualBox installed. Here’s the Vagrantfile I’m using:
VAGRANTFILE_API_VERSION = "2"

Vagrant.configure(VAGRANTFILE_API_VERSION) do |config|
  config.vm.box = "ubuntu/trusty64"

  # Ember default port
  config.vm.network "forwarded_port", guest: 4200, host: 4200

  # LiveReload default port
  config.vm.network "forwarded_port", guest: 35729, host: 35729

  config.vm.hostname = "ember-server"
  config.vm.network "public_network", ip: "192.168.0.160"
end
This will tell Vagrant create an Ubuntu 14.04 VM and give it a static IP. In addition, this also tells VirtualBox to forward two ports from the guest to the host. So ports 4200 and 35729 will be accessible via http://localhost:4200 and http://localhost:35729.
Run vagrant up and this will set up your VM and you’re ready to start installing dependencies.
Install dependencies
By this point, your VM should already be running and you should be able to ssh into it by running vagrant ssh. Once you’re in, you need to run the following commands as sudo to install the dependencies needed:
# Add git ppa repository
add-apt-repository ppa:git-core/ppa

# Install Ubuntu build dependencies
curl -sL https://deb.nodesource.com/setup | bash -
apt-get install -y nodejs git build-essential automake

# Install Samba
apt-get install -y samba samba-common python-glade2 system-config-samba

# Install ember-cli and bower
npm install -g ember-cli bower
This will install all the dependencies needed to be able to compile ember projects and to be able to start samba.
Configure Samba
This section is a bit more involved as we have to edit a configuration file and run some crazy commands, but let’s get started. So first of all you’ll need to edit /etc/samba/smb.conf to have the following contents:
[global]
workgroup = WORKGROUP
server string = Samba Server %v
security = user
map to guest = bad user
name resolve order = bcast host
dns proxy = no

[ember-workspace]
path = /samba/ember-workspace
browsable = yes
writable = yes
guest ok = no
read only = no
This is going to be the Samba configuration that we need to access the files from Windows. If your WORKGROUP is different, make sure to edit it otherwise leave as-is.
Next we need to create the folder that we want to share and give it the proper permissions. Run these commands using sudo:
share=/samba/ember-workspace
mkdir -p $share
chmod -R 0755 $share
chown -R vagrant:vagrant $share
Next we need to give our samba user,vagrant, a password:
sudo smbpasswd -a vagrant
Finally, we must restart the samba service:
sudo service smbd restart
DONE!
Optional: You may want to create a symlink to the ember-workspace into your vagrant home
ln -s /samba/ember-workspace /home/vagrant/ember-workspace
Configure Windows
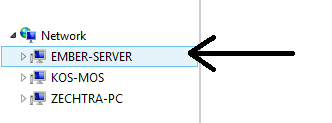
We’re almost there, all we need to do now is authenticate against our Samba server. Open a new explorer.exe window and the network location. If you followed the defaults it’l be named EMBER-SERVER.

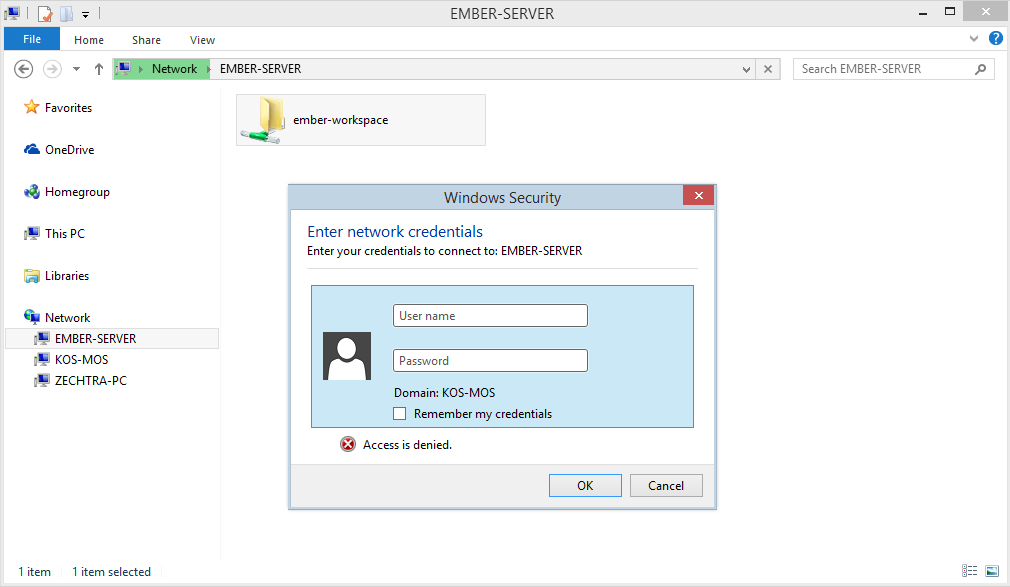
Double-clicking on the network location will reveal the share, ember-workspace. Trying to open that will bring up a login prompt, in which you’ll type in the user vagrant and whatever password you chose when running the smbpasswd command.

Once you authenticate, you can choose to mount the drive and use it as if it on your local drive.
Results
Running the same application from my initial experience resulted in this:
vagrant@ember-server:~/ember-workspace/awesomesauce$ ember serve
version: 0.1.12
Livereload server on port 35729
Serving on http://0.0.0.0:4200/

Build successful - 404ms.

Slowest Trees                  | Total
-------------------------------+----------------
Concat: Vendor                 | 114ms
SixToFive                      | 36ms
ES3SafeFilter                  | 30ms
ES6Modules                     | 29ms
JSHint app- QUnit              | 21ms

file changed templates/gravy.hbs

Build successful - 230ms.

Slowest Trees                  | Total
-------------------------------+----------------
Concat: Vendor                 | 79ms
SourcemapConcat                | 25ms
SourcemapConcat                | 15ms
I don’t know about you, but this is very awesome! This is a very long process, so I’d recommend you fork my project in Github that’s ready to go.
Problems
As with anything I touch, nothing every works 100%. I’m having some issues with Webstorm being a bit slow on indexing and being able to realize that files have changed. If anyone has a solution for that I’d greatly appreciate a note or comment below.