Recently, I discussed with a friend how they organize their docker-compose stacks into their personal home lab.They told me they used Portainer to manage all their containers. So I decided to give it a go.
At first glance, it seemed similar to what I already had: a tmux session, with each docker-compose stack in its pane. But then I saw that you can setup a Portainer stack by pointing it to a Git repository. Now this is more appealing! Doing this allows the following:
- Version controlled
docker-compose.yamlfiles - Trigger stack update via the UI or webhook
- Environment variables via the UI
I was sold!
I thought all I needed to do was install Portainer and Gitea, then set up some webhooks.
Planning
My home lab setup is simple: an old laptop with Ubuntu and a Raspberry Pi with DietPi. I run all my Docker workloads on the laptop and lightweight web applications on the Raspberry Pi. Both machines do not have a lot of storage, so files are store on my NAS via CIFS mounts. These mounts are accessed directly or mounted as volumes for Docker containers.
The plan was simple:
- DietPi
- Ubuntu
- Keep everything the same, except create git repos for each stack and publish to Gitea
Execution
As expected, things didn’t go according to plan. DietPi makes it super simple to install software, but when you need to deviate…it is HELL!
Problems and Solutions
Without a doubt, following the default instructions on the DietPi website will get Gitea up and running in under 5 minutes.
To be clear, we’re installing Gitea on a Raspberry Pi running the DietPi distribution. We will be using SQLite as our database and storing all of Gitea’s files on a CIFS mount.
If you’re following this as a guide, now is the time to install Gitea using dietpi-software. But hold off on anything else; we’ll need to tweak a few things.
Here’s the list of changes that were required to make this all work.
Setup gitea user
The gitea is setup without shell access, but it needs it ¯\(ツ)/¯.
To solve this, execute the command:
$ useradd -s ${SHELL} gitea
You may encounter LC_LANG warnings. To address these, run:
$ locale-gen
Generating locales (this might take a while)...
  en_US.UTF-8... done
Generation complete.
CIFS Mount Permissions
This change will allow Gitea to create directories in our CIFS mount.
DietPi includes a useful tool for mounting external drives, named dietpi-drive_manager. Use it to connect your network drive.
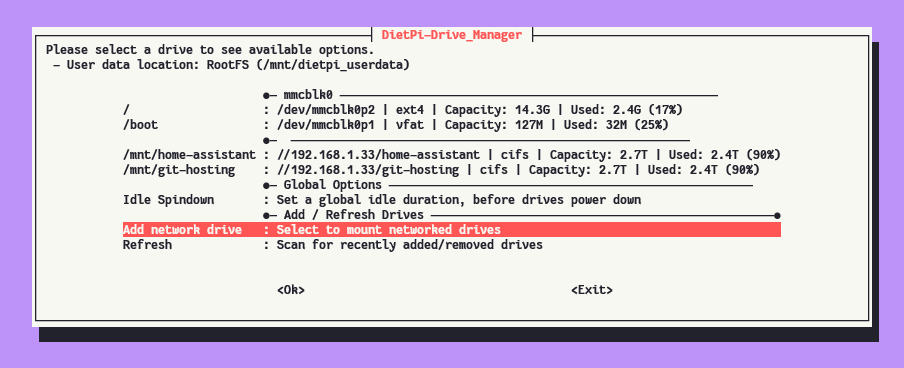
DietPi uses systemd to manage mounts, with /etc/fstab serving as the key reference.
Our initial step is to assign ownership of the CIFS mount to the gitea user. This is done by setting the uid option to gitea.
#----------------------------------------------------------------
# NETWORK
#----------------------------------------------------------------
//192.168.1.33/git-hosting /mnt/git-hosting cifs cred=/var/lib/dietpi/dietpi-drive_manager/mnt-git-hosting.cred,iocharset=utf8,uid=gitea,gid=dietpi,file_mode=0770,dir_mode=0770,vers=2.1,nofail,noauto,x-systemd.automount
To play it safe, let’s keep the gid as dietpi. This precaution ensures that other processes running under dietpi can still modify the directory if needed.
Remember to run systemctl daemon-reload whenever you change fstab.
To check if it worked, look at the directory’s owner with:
$ ls -lah /mnt/git-hosting
total 4.0K
drwxrwx--- 2 gitea dietpi    0 Feb  9 03:53 .
drwxr-xr-x 7 root  root   4.0K Feb  9 04:27 ..
drwxrwx--- 2 gitea dietpi    0 Feb  9 03:53 @Recycle
drwxrwx--- 2 gitea dietpi    0 Feb  9 03:56 gitea
SQLite on a CIFS mount
Using SQLite on a CIFS mount is optional. You might prefer to use the MySQL database that DietPi recommends and comes pre-installed.
If you place the database in a CIFS mount, you’ll get errors about the database being locked. This is a known issue and the workaround is to mount the CIFS mount with the nobrl option.
Don’t use
nobrlas the default, this option prevents file locking. Multiple users modifying the same files could lead to corruption.
To enable this, let’s modify /etc/fstab by adding this option. Follow the same steps above, now my entry looks like so:
#----------------------------------------------------------------
# NETWORK
#----------------------------------------------------------------
//192.168.1.33/git-hosting /mnt/git-hosting cifs cred=/var/lib/dietpi/dietpi-drive_manager/mnt-git-hosting.cred,iocharset=utf8,uid=gitea,gid=dietpi,file_mode=0770,dir_mode=0770,vers=2.1,nofail,noauto,nobrl,x-systemd.automount
Lastly, run systemctl daemon-reload to save changes.
For more context, check out Lee Cheng Hui’s blog post.
Dropbear SSH Server
Although DietPi recommends Dropbear for SSH, it doesn’t seem compatible with Gitea’s SSH logins.
To fix this, run dietpi-software > SSH Server > OpenSSH Server.
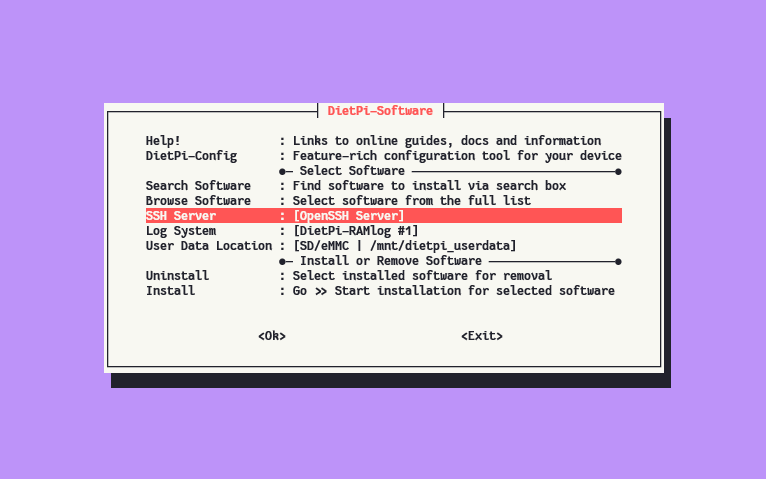

Although OpenSSH Server is noted to use more resources, it was necessary for my setup to function correctly.
Access Local Ports from Portainer
After installing Portainer on DietPi with dietpi-software, I encountered an issue: Portainer couldn’t access the Gitea server on the same machine.
Gitea is running directly on the Raspberry Pi, while Portainer is running in a Docker container. Here’s Gitea’s Portainer install script. Portainer performs basic checks, essentially boiling down to a Docker run command flagged with restart=always.
We can choose to forgo DietPi’s version and run this ourselves or modify the dietpi-software script.
I chose to modify.
vim /boot/dietpi/dietpi-software
Whichever your choice is, you need to update the docker run command by adding --add-host=host.docker.internal:host-gateway. This will allow processes running inside Docker containers to access hosts’ processes via host.docker.internal instead of localhost.
My command now looks like this:
G_EXEC_OUTPUT=1 G_EXEC docker run -d -p '9002:9000' --add-host=host.docker.internal:host-gateway --name=portainer --restart=always -v '/run/docker.sock:/var/run/docker.sock' -v 'portainer_data:/data' 'portainer/portainer-ce'
Again, you can simply run this command without modifying the script.
Completing Gitea Setup
We haven’t finished setting up Gitea yet. Please visit the Gitea URL on port 3000 to complete the process. You can now select SQLite as the database and opt to store all of Gitea’s data on the CIFS mount.
You will need to create a user, which will become the administrator of the Gitea instance. Create a repository with a docker-compose.yaml and you should be good to go!
Webhooks on Portainer and Gitea
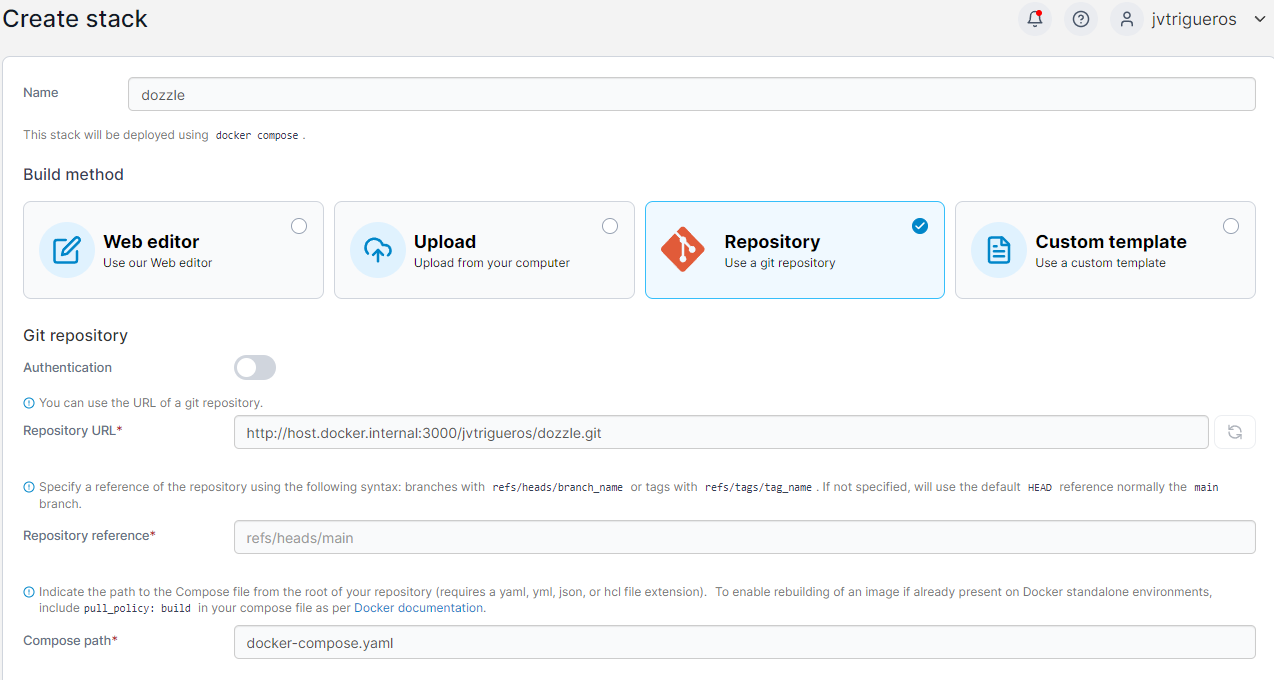
With a Gitea repository ready, you can add a stack as follows:
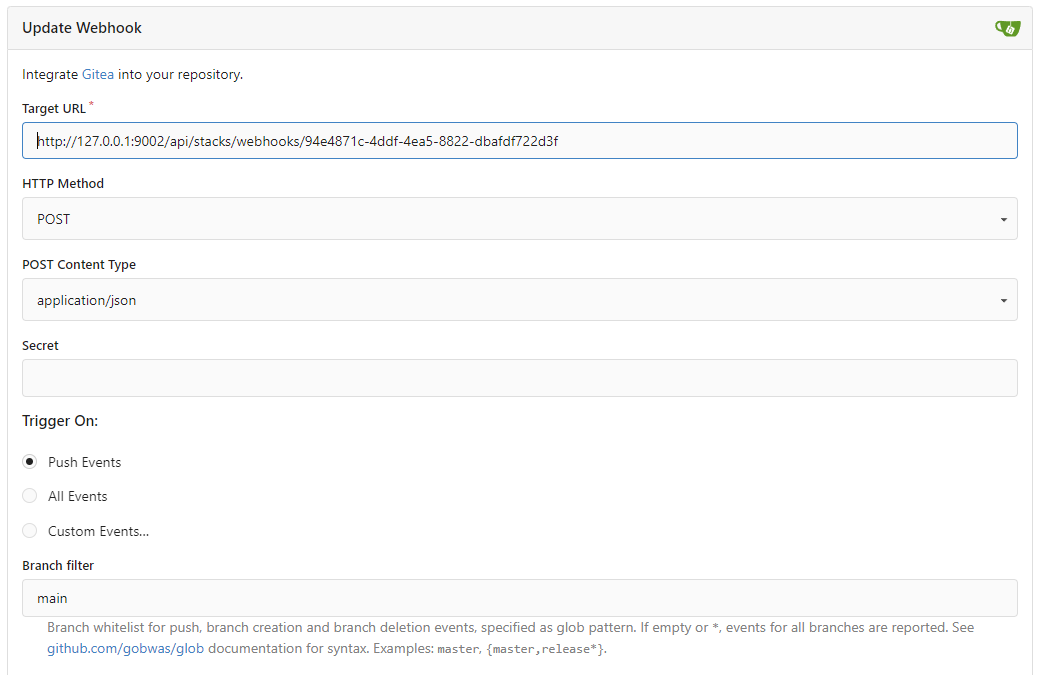
Then enable GitOps, to reveal the webhook link.
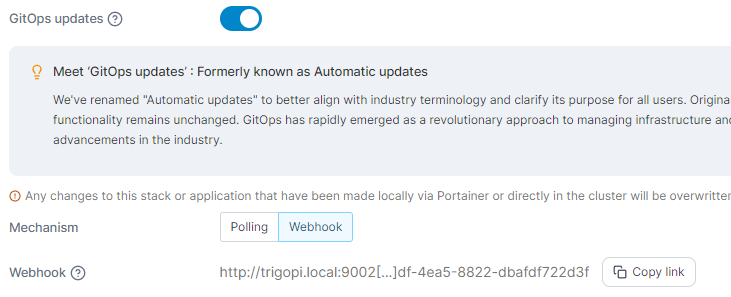
The webhook url may have a host using your .local address. This didn’t work for me, so I replaced that with 127.0.0.1 when adding it on Gitea’s webhook settings.
Conclusion
After applying all these changes, we can now commit changes to docker-compose.yaml files push them to Gitea and have it trigger a stack reload if there were any changes.
Discovering all these issues set me back a whole afternoon, if this helps at least one person it was time well spent :D